Monday, April 9, 2012

April DIY - Magnetic Board

So, I have decided to feature @ least one DIY project each month...complete with directions, details, pictures and maybe soon videos....hopefully this will inspire you and also keep me in inspiration mode!!

So I bring you this months DIY project..."Twitting Magnetic Board" 

I created this magnetic board as an Easter gift for my twin sister (she is the godmother to my little boy...and my children call her Nannie!) She does not tweet...so I thought I would make her a real twitting board for her desk at work...with pics of the kids and extra magnets to attach anything else! After creating this board...various ideas kept popping in my head...so I will definitely be making more!


So here is how I did it...

Step 1: First you will need a magnet board of some sort...I purchased my from Michael's in the same seasonal section of the store where they have lots of crates full of things for a $1. It was a magnet calendar board...that I knew I would definitely do something else with it...but for a $1...who can pass that up! Also while you are @ the craft store...make sure to pick up some small magnets.

Here is a list of some supplies you will need to get started with a project like this...
-Hot glue gun
-Thin Fabric to cover the magnetic board
-Small magnets
-Scissors
-small pictures (I love using instagram pics...download the app PostalPix....to get instagram pics mailed straight to your house...and they will be as cute as they are on your iphone!)
-stickers, buttons, and small scraps for added decor!
-I used the following scrapbooking products which you can find them all @ TwoPeas 

Bella Blvd. designer tape


Pink Paislee Spool Buttons
Heidi Swapp Instaframes -
The cute little tags on my board are a must have...they have sticker hearts and sayings like..."liked", "tweet status", "status update"....very cute...not to mention you get little instaframes...to put your pictures in!


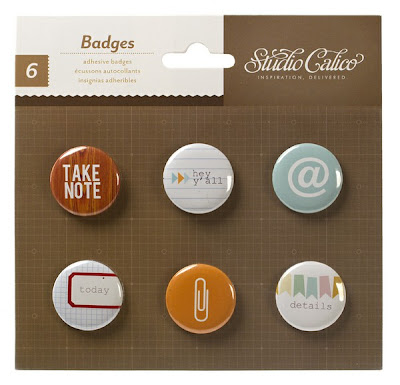
Studio Calico - Take Notes Badges


October Afternoon - Mini letters


Crate Paper - Clothes Pins
Step 2: I covered the magnetic board with yellow fabric...cover the board by wrapping the board with fabric (yes...just like you would wrap a gift)...make sure all the folds and creases are on the back side of the board...and then hot glue everything down. Don't put any hot glue on the front of the board...only the back side. Make sure the fabric is pulled tight and there are no bumps on the front side...if all that is straight...then you are ready to move to step 3!

Step 3: After I covered the board with fabric...I began pulling together my embellishments and then created the banner for the top of the board. I used a scrap of vintage material to create a ribbon for the top of the board and a fabric bird, a hand made fabric flower, and other small flowers I had in my scrapbook stash then I hot glued everything together and adhered it to the board. 

Step 4: you will need to begin creating your embellished magnets....make sure to have small thinner magnets because you will need to glue that to the back of whatever button, flower, badge or pin you use...it is best to just use hot glue for the magnets too! After that is done...just put them on the magnet board and arrange everything how you like...and you are done!! 

This project will probably be done in about an hour...maybe sooner...it is super easy and the possibilities are unlimited!! 

Have fun creating!


Party invites...

Hey guys-

I recently did a post about Juliette's birthday theme....titled Miss Juju is almost 2! please click on the link to get the details about the party (if you are interested in knowing a little more)....but any ways I completed the invites and sent them out and thought I might share with my fellow bloggers how I did them. They were simple to complete, but having the right tools is a must....if not...it would take hours of cutting!!

Here are how they turned out...

Since the theme is Juliette's Vintage Candy Shoppe....I wanted the invites to be in the shape of a Lollipop. I searched on Etsy for days looking for the prefect invites...but nothing quite caught my eye....I wanted to save some time and just order them because I have so many other projects up my sleeves for this party...I thought that would be best....well I came across TomKatStudio....which I have seen her work, but when I found a printable lollipop invitation...I immediately knew what I wanted to do with them! So, I ordered just the printable invitations on etsy and requested that the colors be printed in red, aqua, and pink...instead of the bright candy shoppe colors that I had been seeing all over....Here is a pic of what inspired me....

Picture from The TomKat Studio
Within a few days of my order...The TomKat Studio sent me a digital file of the center circle and the red and white stripe pattern paper. I printed everything out on white cardstock and then began the assembly process! I decided to use three layers...first layer being the center circle with the party details, second layer the red and white stripe paper, and the third layer craft paper (which I feel always adds a nice little vintage feel to my projects!)

To get started you will need a few important supplies...here are a few....
 1. First things first...if you plan on making any type of invitation that involves cutting circles...do yourself a favor and go buy the Martha Stewart circle cutter...it is inexpensive plus very easy to use (I bought mine from Michael's and used a 40% off coupon, but I posted a link to amazon where they are also priced between $12 -$15) ...it cuts circle that range 1" to 5.5" (I don't recommend using this circle cutter for very small circles like 1" - 2"....I find using a circle punch is much easier for smaller inch circles.)

2. The only thing I hand cut for Juliette's invitations was the center circle...the reason I did that was I wanted a really close cut near the aqua polka dots and the circle cutter wasn't giving me that. I distressed the edges of each circle for all three layers (if you look close in the above picture that is how I got the rough edges going around). You can use an edge distresser or if you don't have one (a small steak knife works just as good!)

3. Next, I used the circle cutter to cut 4" circles of the red and white stripe patterned paper and 4.5" circles of the brown craft paper. I also distressed all the edges to those circles. I glued all the layers together and then attached the white cookie stick (these can be found in the baking sections of most stores) You can use either masking tape or packaging tape to adhere the stick to the back of the invitation. Make sure to select your envelope after you create your first sample...reason for this....is if you make the invitation too large or the stick is too long...you will need to adjust...so always nice to have a sample to practice with.

4. I used a variety of tulle, pink bakers twine, and raffa to tie around the lollipop. I wanted to use something a little different than the traditional ribbon and I feel like it added a nice touch to the invitation.

5. Last, I completed the envelopes...I used masking tape and a brown sharpie in the place of traditional printed labels...


As I complete the other projects for the party....I will post pics!

Any questions or further details...just leave a comment.


Related Posts with Thumbnails